구성을 어떻게??
Git 서버에 올라와있는 프로젝트를 기반으로 Jenkins를 구성하려고 한다.

Docker-Jenkins 설정
Docker는 설치되어 있는 걸로 가정한다.
Jenking Docker 이미지 pull 및 Container 실행
docker pull jenkins/jenkins
# Port number (-p option value) can be editable.
docker run -p 8080:8080 -v /var/jenkins_home jeknins/jenkins
Jenkins 기본 설정
맨 처음에는 localhost:8080 (포트 부분은 설정에 따라 달라진다.) 에서 기본적인 설정을 하면 된다. 아래 영상은 Window 환경이지만 브라우저 내에서 하니 과정 자체는 비슷하다고 할 수 있다. 내가 소개하는 방법도 아래 영상과는 크게 다르지 않으니 저 영상을 시청하면서 설정을 해도 무관할 듯 하다.
Plugin 설치
Unity 자동 빌드를 위한 Plugin (Unity3d)를 설치하고 Tools에 Unity 등록을 해야된다. 참고로 Agent Node를 활용하여 잡을 구설할 경우 Master node에서는 Installation Directory를 비워놓으면 된다. 나는 Master-Agent를 구성할 것이기 때문에 비워둔채로 진행한다.

Project 추가 및 구성
Dashboard로 돌아가 “New Item”을 추가한 후 “Freestyle project”를 추가한다. 내가 설정한 부분만 나열해보겠다. (언급 안된곳은 안건드림.)
- Source Code Management: 본인의 Git repository URL 입력, Credential은 해당 Git 서비스의 (gitlab, github 등등) 계정을 입력하면 된다.
- Build Triggers: 취향 껏 고르면 된다. gitlab을 사용하기에 github Webhook을 사용할 수 있을지는 모르겠다. 필자는 periodical로 두었고 H H * * * (매일 맨 처음 설정한 시간에 빌드)를 빌드 시간으로 두었다.
- Build Steps: Invoke Unity3d를 선택해도 되고, Execute shell script를 사용하여도 된다. 허나 지금 젠킨스 내부에서 파라미터를 어떻게 구성하는지를 몰라 shell script를 실행하는 것으로 설정하였다.
- Post-build Action: Archive artifacts를 설정해 빌드 후 파일을 다운로드 받을 수 있도록 설정한다.
Master 노드의 세팅은 얼추 끝났고 Agent 노드를 설정해야 된다.
Agent Node 설정
- Master Node에서 Manage Jenkins -> Nodes -> New Nodes를 클릭하고 새로운 노드를 세팅한다.
- Remote root directory: Agent Node에서 root 디렉토리가 될 곳을 입력한다.
- Usage: 필자는 “Only build jons with label expression matching this node”를 선택했다.
- Node Properties: Tool locations을 클릭 후 Unity Path를 입력해야 한다. Unity는 Master node에 입력했던 정보가 나타나고, 해당 레이블에 맞는 유니티를 실행시키기 위해 Agent node의 Unity 실행 path를 입력하면 된다.
- 이후 Save를 하면, icon이 x 모양인 채로 노드가 등록이 되는데 해당 노드를 클릭하면 Agent node의 쉘에 스크립트를 돌리라고 나온다. 해당 스크립트들을 2번의 Remote root directory에서 실핸시키면 된다.
- 만약 Agent에서 Connection Refused가 발생하면, Websocket 옵션을 키면 되는 것 같다.
Jenkins 환경 변수 설정
Jenkins에서는 환경 변수를 두가지 방법으로 설정할 수 있는데, 첫 번째는 전역 환경변수를 설정하는 것이고 두 번째는 각 노드마다 환경변수를 설정하는 것이다. 나는 각 노드마다 다른 플랫폼의 Unity를 빌드할 예정이니 노드마다 환경변수를 설정할 것이다.
빌드를 진행할 Node의 Configuration으로 들어간다음 Node Properties의 Environment variables를 활성화 한다. 그러면 Name 과 Value를 입력할 수 있는데, Name에 변수명을 기입하고 Value에는 path등 원하는 값을 넣으면 된다. 나는 PROJECT_PATH, UNITY_PATH 그리고 BUILD_PATH_ARG 이렇게 세 가지를 넣었다.
| Variable name | Value |
|---|---|
| UNITY_PATH | Path where Unity executable is installed |
| PROJECT_PATH | Path where target project is placed |
| BUILD_PATH_ARG | Argument that reprent for the path where built application is saved |
다시 프로젝트로 돌아가 설정을 마춰줘야 한다. 먼저 Restrict where this project can be run 이 부분을 활성화 해준다음 잡을 돌릴 Label을 기입하면 된다. 그리고 Build Steps를 열어 Execute Shell을 열어 커맨드를 작성하면 된다.
#!/bin/bash

# Path to Unity Editor. Replace with your actual Unity editor path

export BUILD_PATH=$BUILD_PATH_ARG

cd $UNITY_PATH || exit

# Execute the build
"$UNITY_EXEC" -batchmode -nographics -silent-crashes -projectPath "$PROJECT_PATH" -executeMethod BuildScript.PerformBuild -quit

if [ $? -ne 0 ]; then
    echo "Build failed"
    exit 1
else
    echo "Build Succeeded"
    exit 0
fi
https://docs.unity3d.com/kr/2023.2/Manual/EditorCommandLineArguments.html
위 링크는 Unity 커맨드라인에 관련된 인자들을 정리한 유니티 문서이다. 각자 알맞게 사용하면 될 것이다.
Jenkins에서의 설정은 얼추 끝났고, Unity에서의 설정을 보자.
Unity Build Script 작성
나는 Target Device를 Windows와 Android로 설정하였지만 현재 테스트 환경이 리눅스인지라 리눅스를 상정하고 하겠다. 테스트 결과는 빌드 파일이 성공적으로 나왔지만 만약 Android가 추가적인 설정이 필요하면 추후에 작성하도록 하겠다. 아래는 내가 썻던 빌드 스크립트이다.
using System;
using UnityEditor;
using System.Linq;

public class BuildScript
{
    public static void PerformBuild()
    {
        string buildPath = Environment.GetEnvironmentVariable("BUILD_PATH");

        if(string.IsNullOrWhiteSpace(buildPath))
        {
            throw new ArgumentNullException(paramName:"BUILD_PATH");
        }

        string[] defaultScene = EditorBuildSettings.scenes
            .Where(s => s.enabled)
            .Select(s => s.path)
            .ToArray();

        BuildTarget buildTarget = EditorUserBuildSettings.activeBuildTarget;

        BuildPlayerOptions buildPlayerOptions = new BuildPlayerOptions
        {
            scenes = defaultScene,
            locationPathName = buildPath, // Output path
            target = buildTarget, // Target platform
            options = BuildOptions.None
        };

        BuildPipeline.BuildPlayer(buildPlayerOptions);
    }
}
테스트 결과
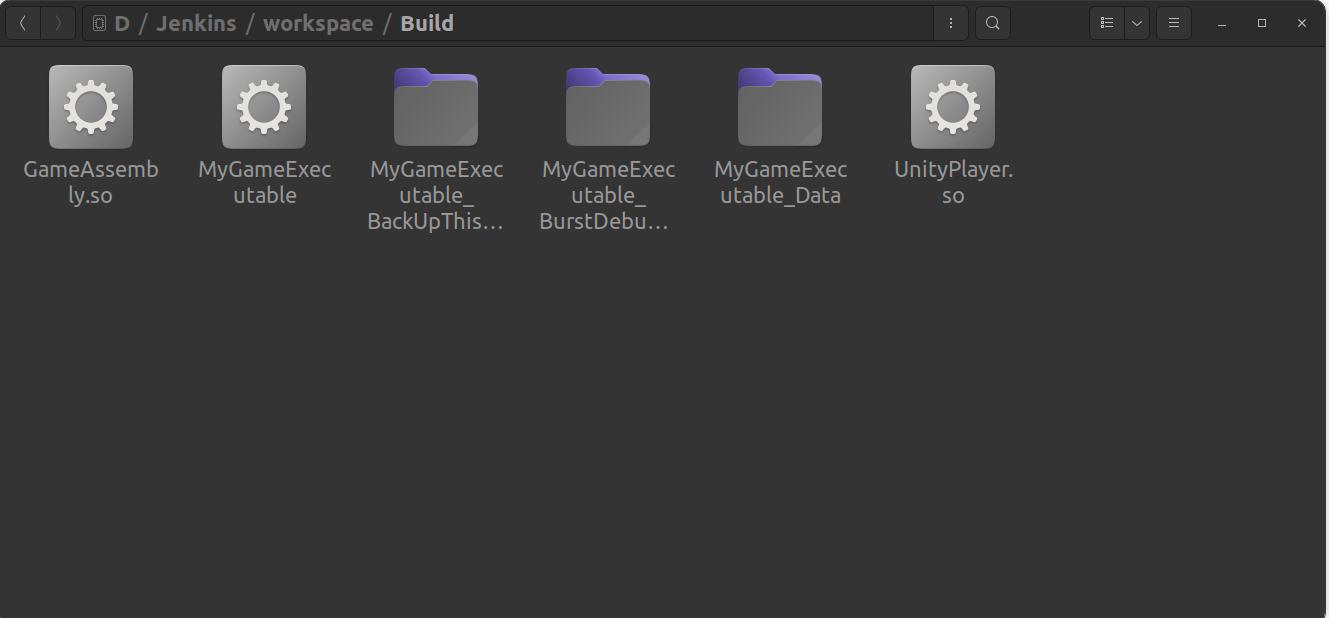
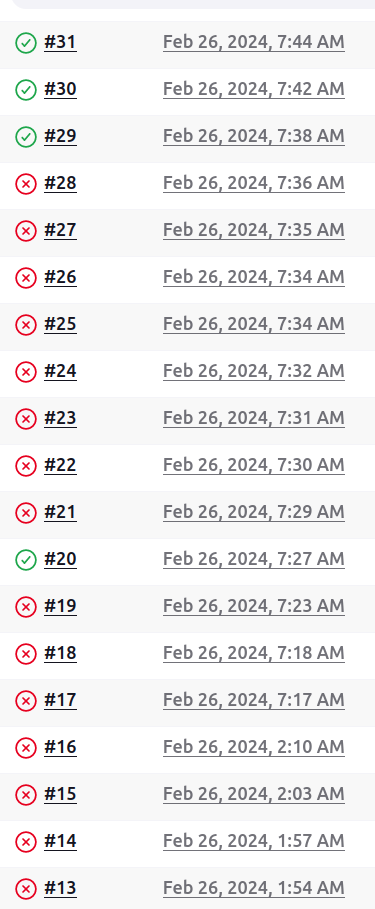
시행착오 끝에 기본적인 세팅은 끝난 것 같다…
억울하지만 Linux에서는 Windows Il2cpp 빌드가 되지 않는다 들었다. 현재 사용가능한 머신은 하나뿐이니 Windows 다시 세팅하고 오겠다…